FAQ
Paperlandmarks Architectural Models
What age would you estimate is the minimum for putting one of these together? Are some easier than others? We recommend our kits for anyone from 14 years, but some 10 year olds have done well, too, just patience and motor skills are usually better with larger kids. The following pre-cut models are better for younger children and generally beginners in paper model building since they contain less details and no cutting is needed - just folding and gluing:
Mayan Pyramid
Eiffel Tower
Golden Gate Bridge
New York Skyscraper
For kids from age 6 we highly recommend our bright coloured FoxeTroo kits.
Venice Campanile model: is this a difficult or easy project? How would you rate the difficulty on this?
The Venice Campanile model is not difficult, it has not many parts or complex assembling is required. There are tiny windows that need to be cut out accurately but it is not a long or difficult task.
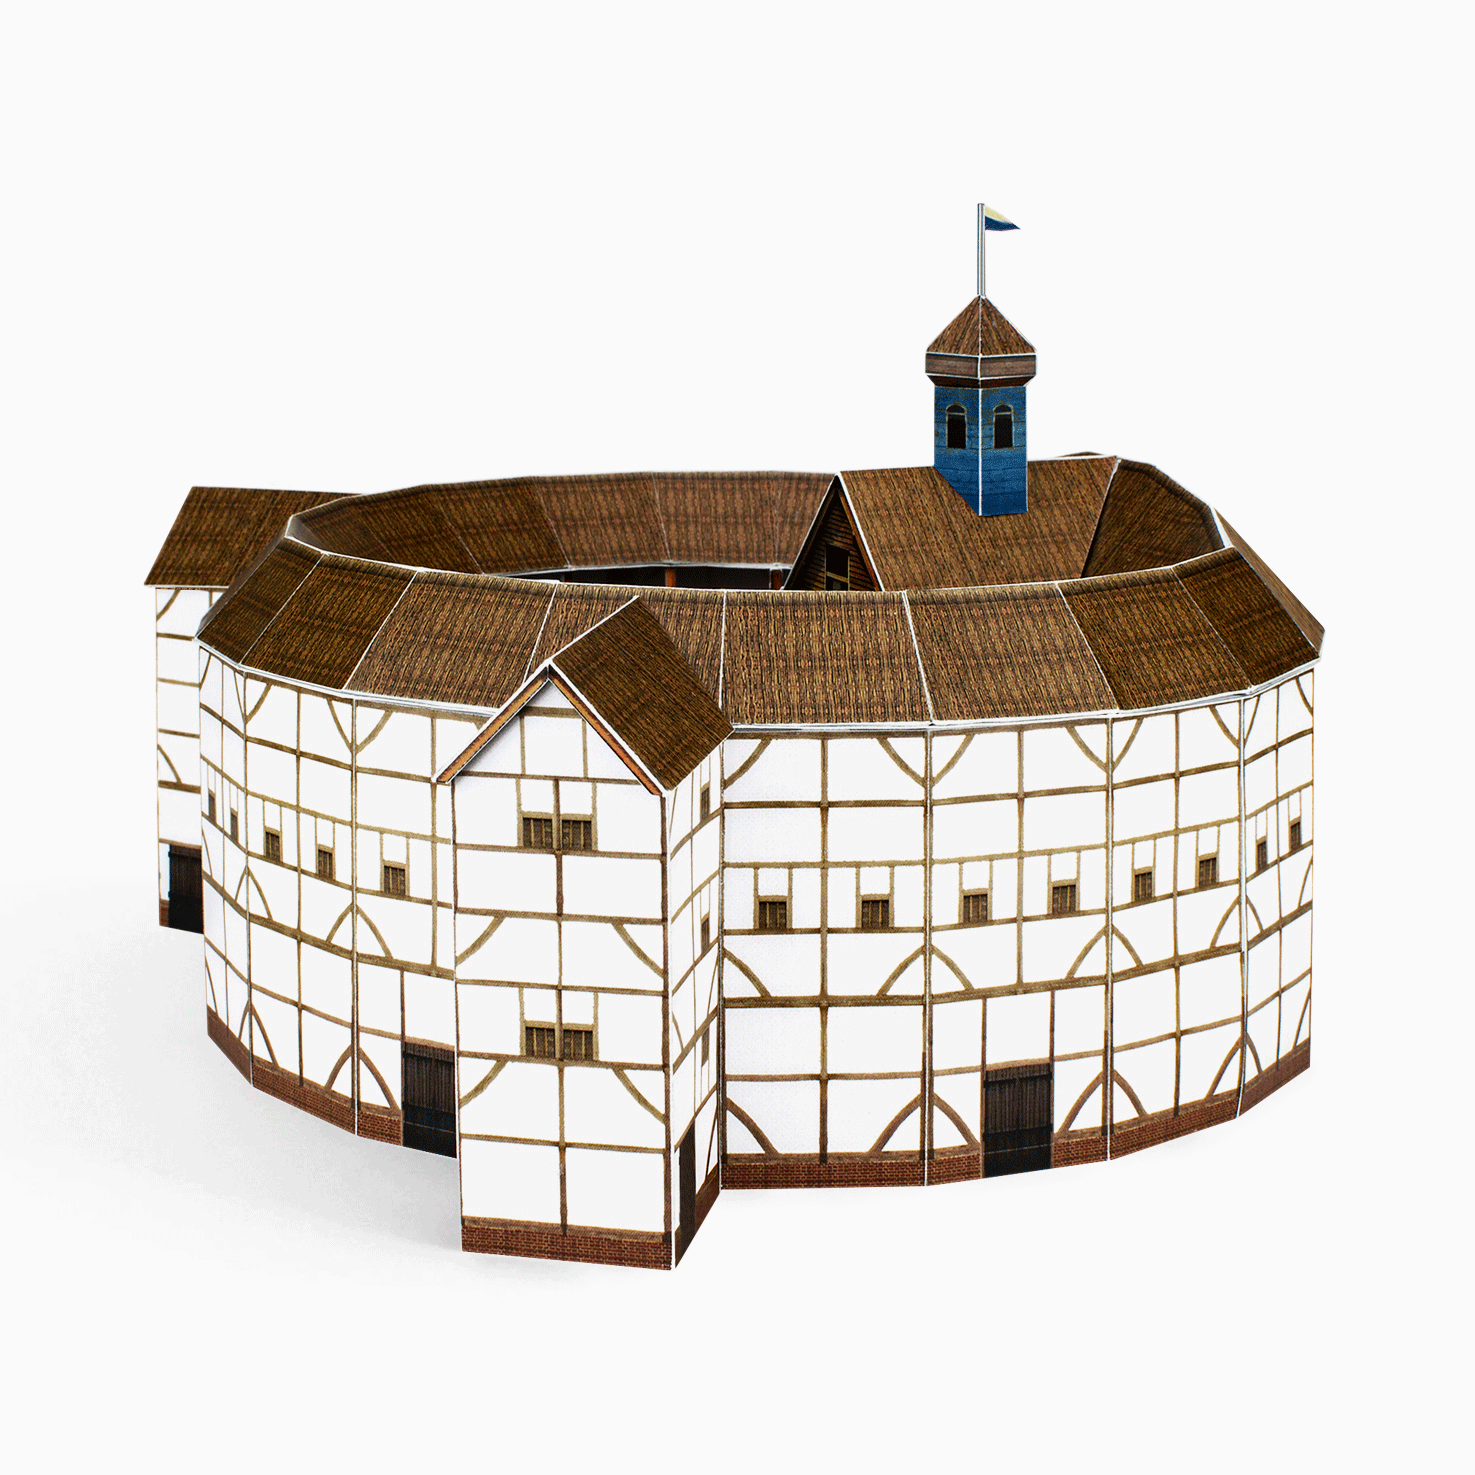
Globe Theatre - How difficult is this to assemble? Could a 5th grader do it?
In general, we do recommend our architectural model kits from 14 years but we know of younger kids that have been able to assemble as well, especially with some help from their parents, older siblings or friends. That said, the Globe Theatre model is not a beginner's kit since it involves a lot of parts, accurate cutting and patience with gluing. So it's doable but some help should be advised.
Is your paper thick? What tools do I need?
For PaperLandmarks models we use sturdy papers within the range of 250-300 gsm depending on the model; it's easy to score and cut with a hobby knife (X-Acto or similar). It's not so easy to use scissors as some details are quite small and delicate so we recommend cutting with a knife. We recommend using a white glue (PVA, Elmer's or similar). You can use paper strips or ear picks as gluing tools.
What is the thickness difference between Printed Kit and Pre-cut Kit?
There is no difference in thickness between Printed Kit and Pre-cut Kit, they both come on A4 size sheets, made from the same paper and are shipped flat-packed in a large envelope A4 size sheets. With a Printed Kit you will have the cutting and scoring lines for the parts printed on paper sheets, you will need to cut, score, fold and glue the parts in order to assemble the model according to the set-up instructions. With a Pre-cut Kit you will have the parts on the sheets pre-cut, you will need to remove them from the sheets, fold and glue in order to assemble the model according to the set-up instructions.
Can I get this model in different colour or size?
Some of the kits come in a variety of colours to choose from. For some models it is possible to enlarge or reduce the model size up to twice the original size.
Can I order a custom model?
Yes, we make custom models. Please send us your project description and deadline so we can give you a quote. What is difference between shipping and delivery time? Shipping or dispatch time means the days (usually 1-2 business days) needed for preparing your order and shipping it, while delivery time means days needed for the mail or courier service to deliver the order to you.
What is the fastest shipping time available?
1-4 business days (not counting the order day) depending on destination location if you choose Express shipping at the check-out. We are shipping from the UK and use courier services like TNT or FedEx for Express shipping orders, so please let us know your phone number for delivery purposes if you opt for it.
Where are you shipping from? I am in San Francisco. If I order Golden Gate now when will I get it?
We are shipping from Cheltenham, United Kingdom. Standard mail to the U.S. usually takes around 5-7 business days (7-10 days), express mail (like TNT or FedEx) takes 2-4 business days. If you are in SF you can buy the Golden kit at SFMOMA, Coit Tower or Golden Gate gift shops.
I live near Chicago, IL. Is this available in any shops in my area?
Not yet, but we can ship to you - an order will reach you in 7 to10 days by standard mail or 2 to 4 business days by express mail.
I live in Malibu - are you able to send this overnight?
No, we ship from the United Kingdom - it would take 2-4 business days via Express mail (delivery by FedEx or similar courier service) or 7-10 days days via Standard mail (delivery by USPS).
Can I track where my order is?
Yes, unless it is a FoxeTroo kit or a postcard model. Please use the tracking number we provide. Track your order through Royal Mail website, http://www.track-trace.com/post or a website of your country's mail service.
I just realised I put the wrong shipping address on my order. Could I change it?
If your order hasn't been shipped yet, there is no problem to change the address. If it is already shipped we can't change the address.
Can I cancel my order?
Custom orders, including assembled PaperLandmarks models, can't be returned and refunded. All other orders can be returned at your expense. We will issue refund only if you return unopened kits in good quality within 30 days of receipt. We will issue a refund once the parcel returns. Please notice that the shipping fee is non-refundable as described in our shop policies.
I received the order in a damaged condition.
We pack the orders with care, and we rely on our trusted shipping partners who deliver our shipments to you. But in the unlikely event that something has gone wrong, please do not hesitate to get in touch with us.
I received an incomplete order.
We pack the orders with great attention to detail, please do not hesitate to get in touch with us if something has gone not as planned.
Do you offer gift messaging?
We ship PaperLandmarks model kits in beautiful project envelopes with a minimum necessary product information attached. We can add a gift message on your behalf. Just write in the gift message text when placing your order.
Foxetroo Kits for Kids
What is the best glue to use for Foxetroo models?
Use a glue stick, we recommend a solvent-free green SCOTCH stick.
How can Foxetroo kits help to enhance handwriting skills?
They are perfect for fine motor skill exercises as they offer a fantastic scissor activity that will put to work the very same muscles which are needed to manipulate a pencil in a mature tripod grasp.
How to hold scissors correctly?
The type and size of the scissor holes affects the exact positioning of the fingers: For scissors that have two small round holes the correct scissor position is with the thumb and middle finger in the handles of the scissors, the index finger on the outside of the handle to stabilize, with fingers four and five curled into the palm. For scissors with an oval hole and a round hole, the correct position is to put the thumb through the round hole and the index and the middle fingers through the oval hole. For scissors with two oval holes the correct scissor position is with the thumb through the one hole and the index and middle fingers through the other.
Why are the cutting lines and the illustration put on different sides of the worksheets?
Cutting on a line and switching directions is a great visual motor activity. Since the graphics and the cutting/folding pattern are printed on two different sides which are aligned very precisely, it makes easy to focus on cutting the parts out smoothly, as well as to follow the guidelines for assembling the model correctly.
Subscribe to our emails
Be the first to know about new products and exclusive offers.
- Choosing a selection results in a full page refresh.
- Opens in a new window.